Advanced Configuration
If you've been following this guide, you've:
- Learned about front matter and Markdown.
- Learned how to make a blog post and add tags.
- Learned how to make pages and set custom URLs.
- Learned how to personalize your weblog with a title and description.
This final section will teach you how to make some finishing touches on your weblog by adding navigation and customizing how it shows the date and time in blog posts, and customizing how its URL structure works.
Before we jump in, let's refresh on one important part of Markdown: Making links.
Making links in Markdown
If you're familiar with HTML, you know that a link looks something like this:
<a href="https://omg.lol">omg.lol</a>
For this next section, you can make links in your weblog's navigation menu that way if you like, or you can use Markdown links. The Markdown version of the link above looks like this:
[omg.lol](https://omg.lol)
That's a little more compact and easy to read.
Make a navigation menu
Most web sites have some sort of navigation menu. They're so common that many people just refer to it as "the nav." The menu might include links to pages on the website itself, social media profiles, or other sites you maintain. For this exercise we're going to include links to the "About" page you created in the previous section, your omg.lol address page, and a Mastodon profile.
If you created some other page or gave it a custom Location different from /about, make sure you know its location before jumping in.
As with previous customizations, you'll need to visit your configuration file:
- Visit https://omg.lol
- Click "Dashboard"
- Click "Weblog" (If you have more than one omg.lol address, click the one you want to use and then click "Weblog")
- Click the "Configuration" button in the "Tools" section, toward the bottom of the page.
To make things a little easier, your configuration file already has a menu set up. Scroll down a few lines and look for one that looks like this:
// Navigation: about, another-page, <a href="https://example.com">Example</a>, [Example](https://example.com)
You may remember from the previous section about your configuration file that lines starting with a // or ;; are "comments." weblog.lol doesn't do anything with configuration settings that are "commented out." That's the case here.
When you're working with a configuration file, it's a good practice to make incremental changes and use comments liberally so that it's easy to get back to a "known good state" -- something that was working before you started making changes. So instead of changing this line, let's make a copy so that we have a good example of how the Navigation setting is supposed to look. Just do that by copying and pasting the line right underneath itself, so you have:
// Navigation: about, another-page, <a href="https://example.com">Example</a>, [Example](https://example.com)
// Navigation: about, another-page, <a href="https://example.com">Example</a>, [Example](https://example.com)
As you can see, Navigation is just a comma-delimited list that can use several kinds of values: weblog locations, HTML links, and Markdown links.
In order of their appearance in the sample navigation:
-
aboutis a page or post address on your weblog. If you've followed this guide closely, you created an About page in the previous section and gave it a customLocationof/about. -
another-pageis also a page or post address on your weblog. Unless you've made this page yourself, you won't haveanother-pageto link to. If a page with a given address on this list doesn't exist, weblog.lol will skip over it when it's making a navigation menu. -
<a href="https://example.com">Example</a>is a regular HTML link. -
[Example](https://example.com)is a Markdown link.
Just like the example, you can mix and match how you add links to your navigation menu.
For now, it will be useful to see what happens when you try to use the default Navigation setting found in your configuration file, so let's uncomment one of those two Navigation lines:
// Navigation: about, another-page, <a href="https://example.com">Example</a>, [Example](https://example.com)
Navigation: about, another-page, <a href="https://example.com">Example</a>, [Example](https://example.com)
... then click the "Save and Publish" button.
There's not a one-click way to get to your weblog, so just point your browser to https://YOURADDRESS.weblog.lol.
If you've followed this quick start guide closely, your weblog will look something like this:
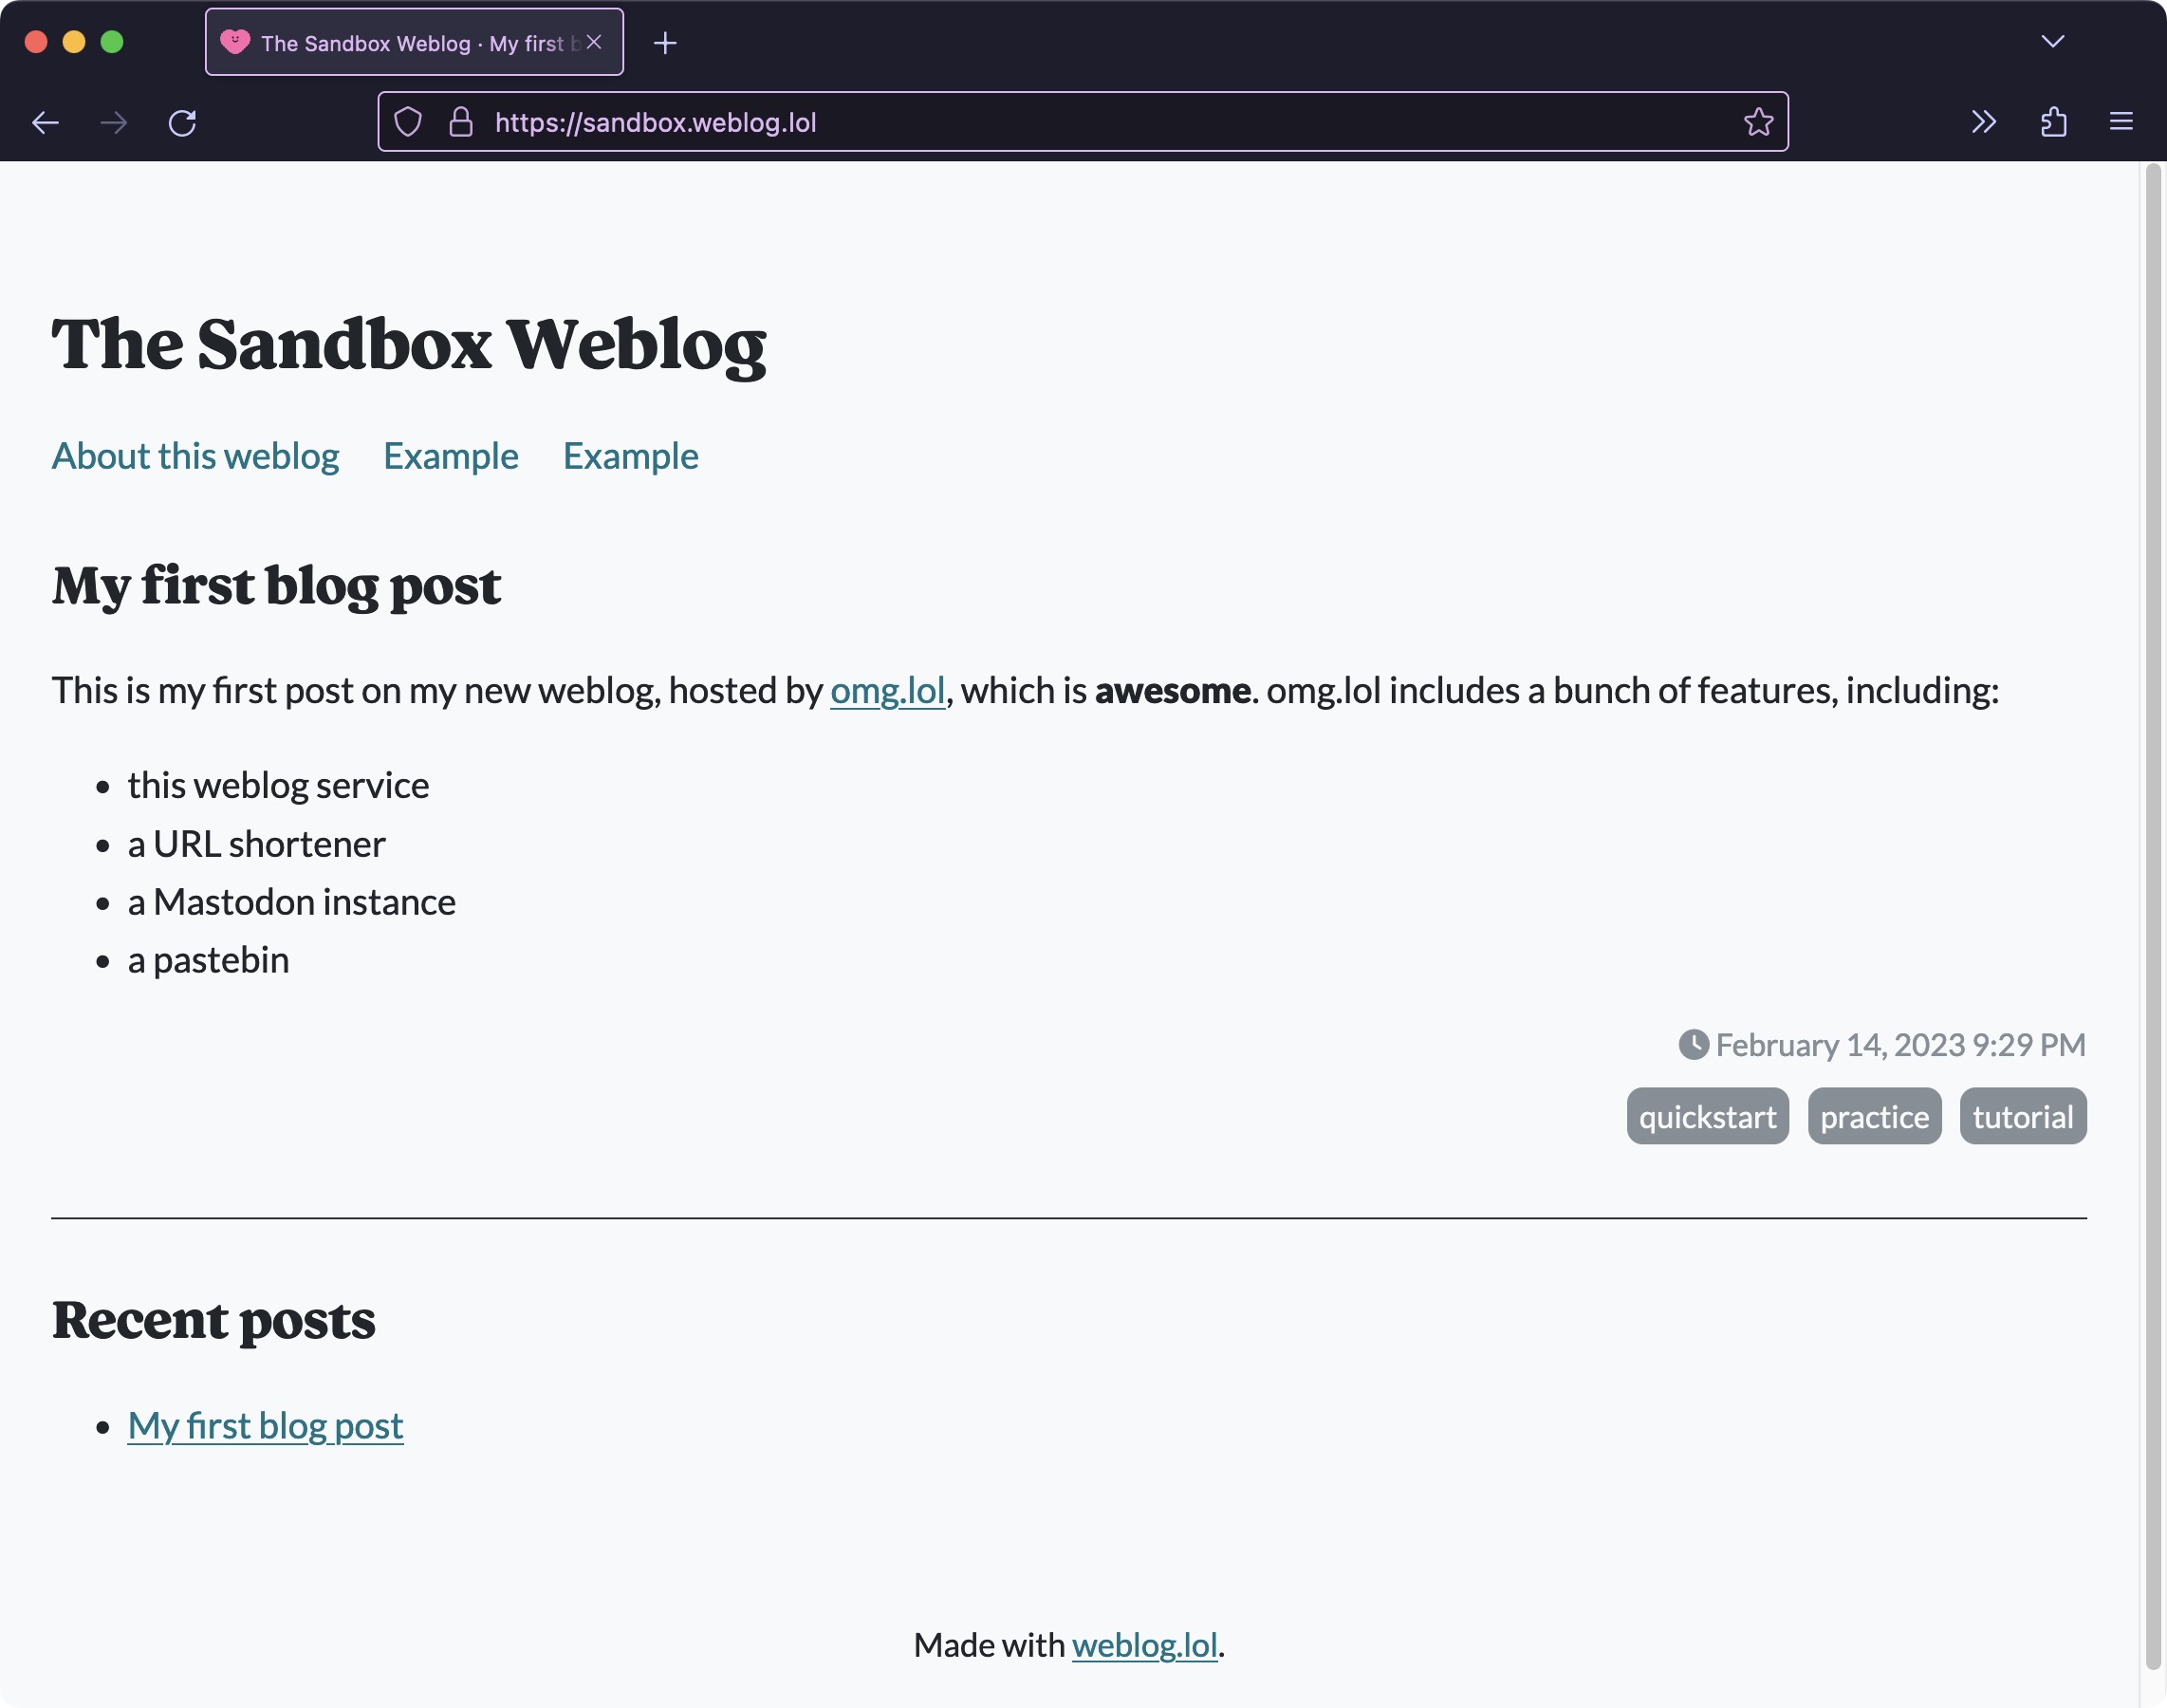
Your new menu is just underneath your weblog's title in the upper left corner of the page.
Looking closely, the results might seem a little different from what you were expecting:
The first link in the Navigation setting, which we set to about, shows the title of page it links to, not the shorter version we set in the Location setting in the page's front matter.
The second link in the Navigation setting, which we set to another-page, doesn't appear at all because that location doesn't exist in our weblog. If a page ever fails to appear in the navigation, always check to make sure its address or custom Location matches what you put in the Navigation setting exactly.
The third and fourth links, the HTML and Markdown links, appear about as you'd expect.
Let's circle back to that first link:
If you'd prefer to use shorter text to keep things a little more readable, you can go back to your "About" page and add a setting in the front matter. Using the example we created in the last section, for instance, your front matter would change from this:
---
Date: 2023-02-13 19:17
Type: Page
---
to this:
---
Date: 2023-02-13 19:17
Type: Page
Title: About
---
The title you set in the front matter will override the title you set using the Markdown # (heading) tag for purposes of the navigation.
So let's finish up the navigation and move on. Open your weblog's configuration file by clicking the "Configuration" button in the "Tools" section, toward the bottom of the page and scrolling back to your Navigation settings:
// Navigation: about, another-page, <a href="https://example.com">Example</a>, [Example](https://example.com)
Navigation: about, another-page, <a href="https://example.com">Example</a>, [Example](https://example.com)
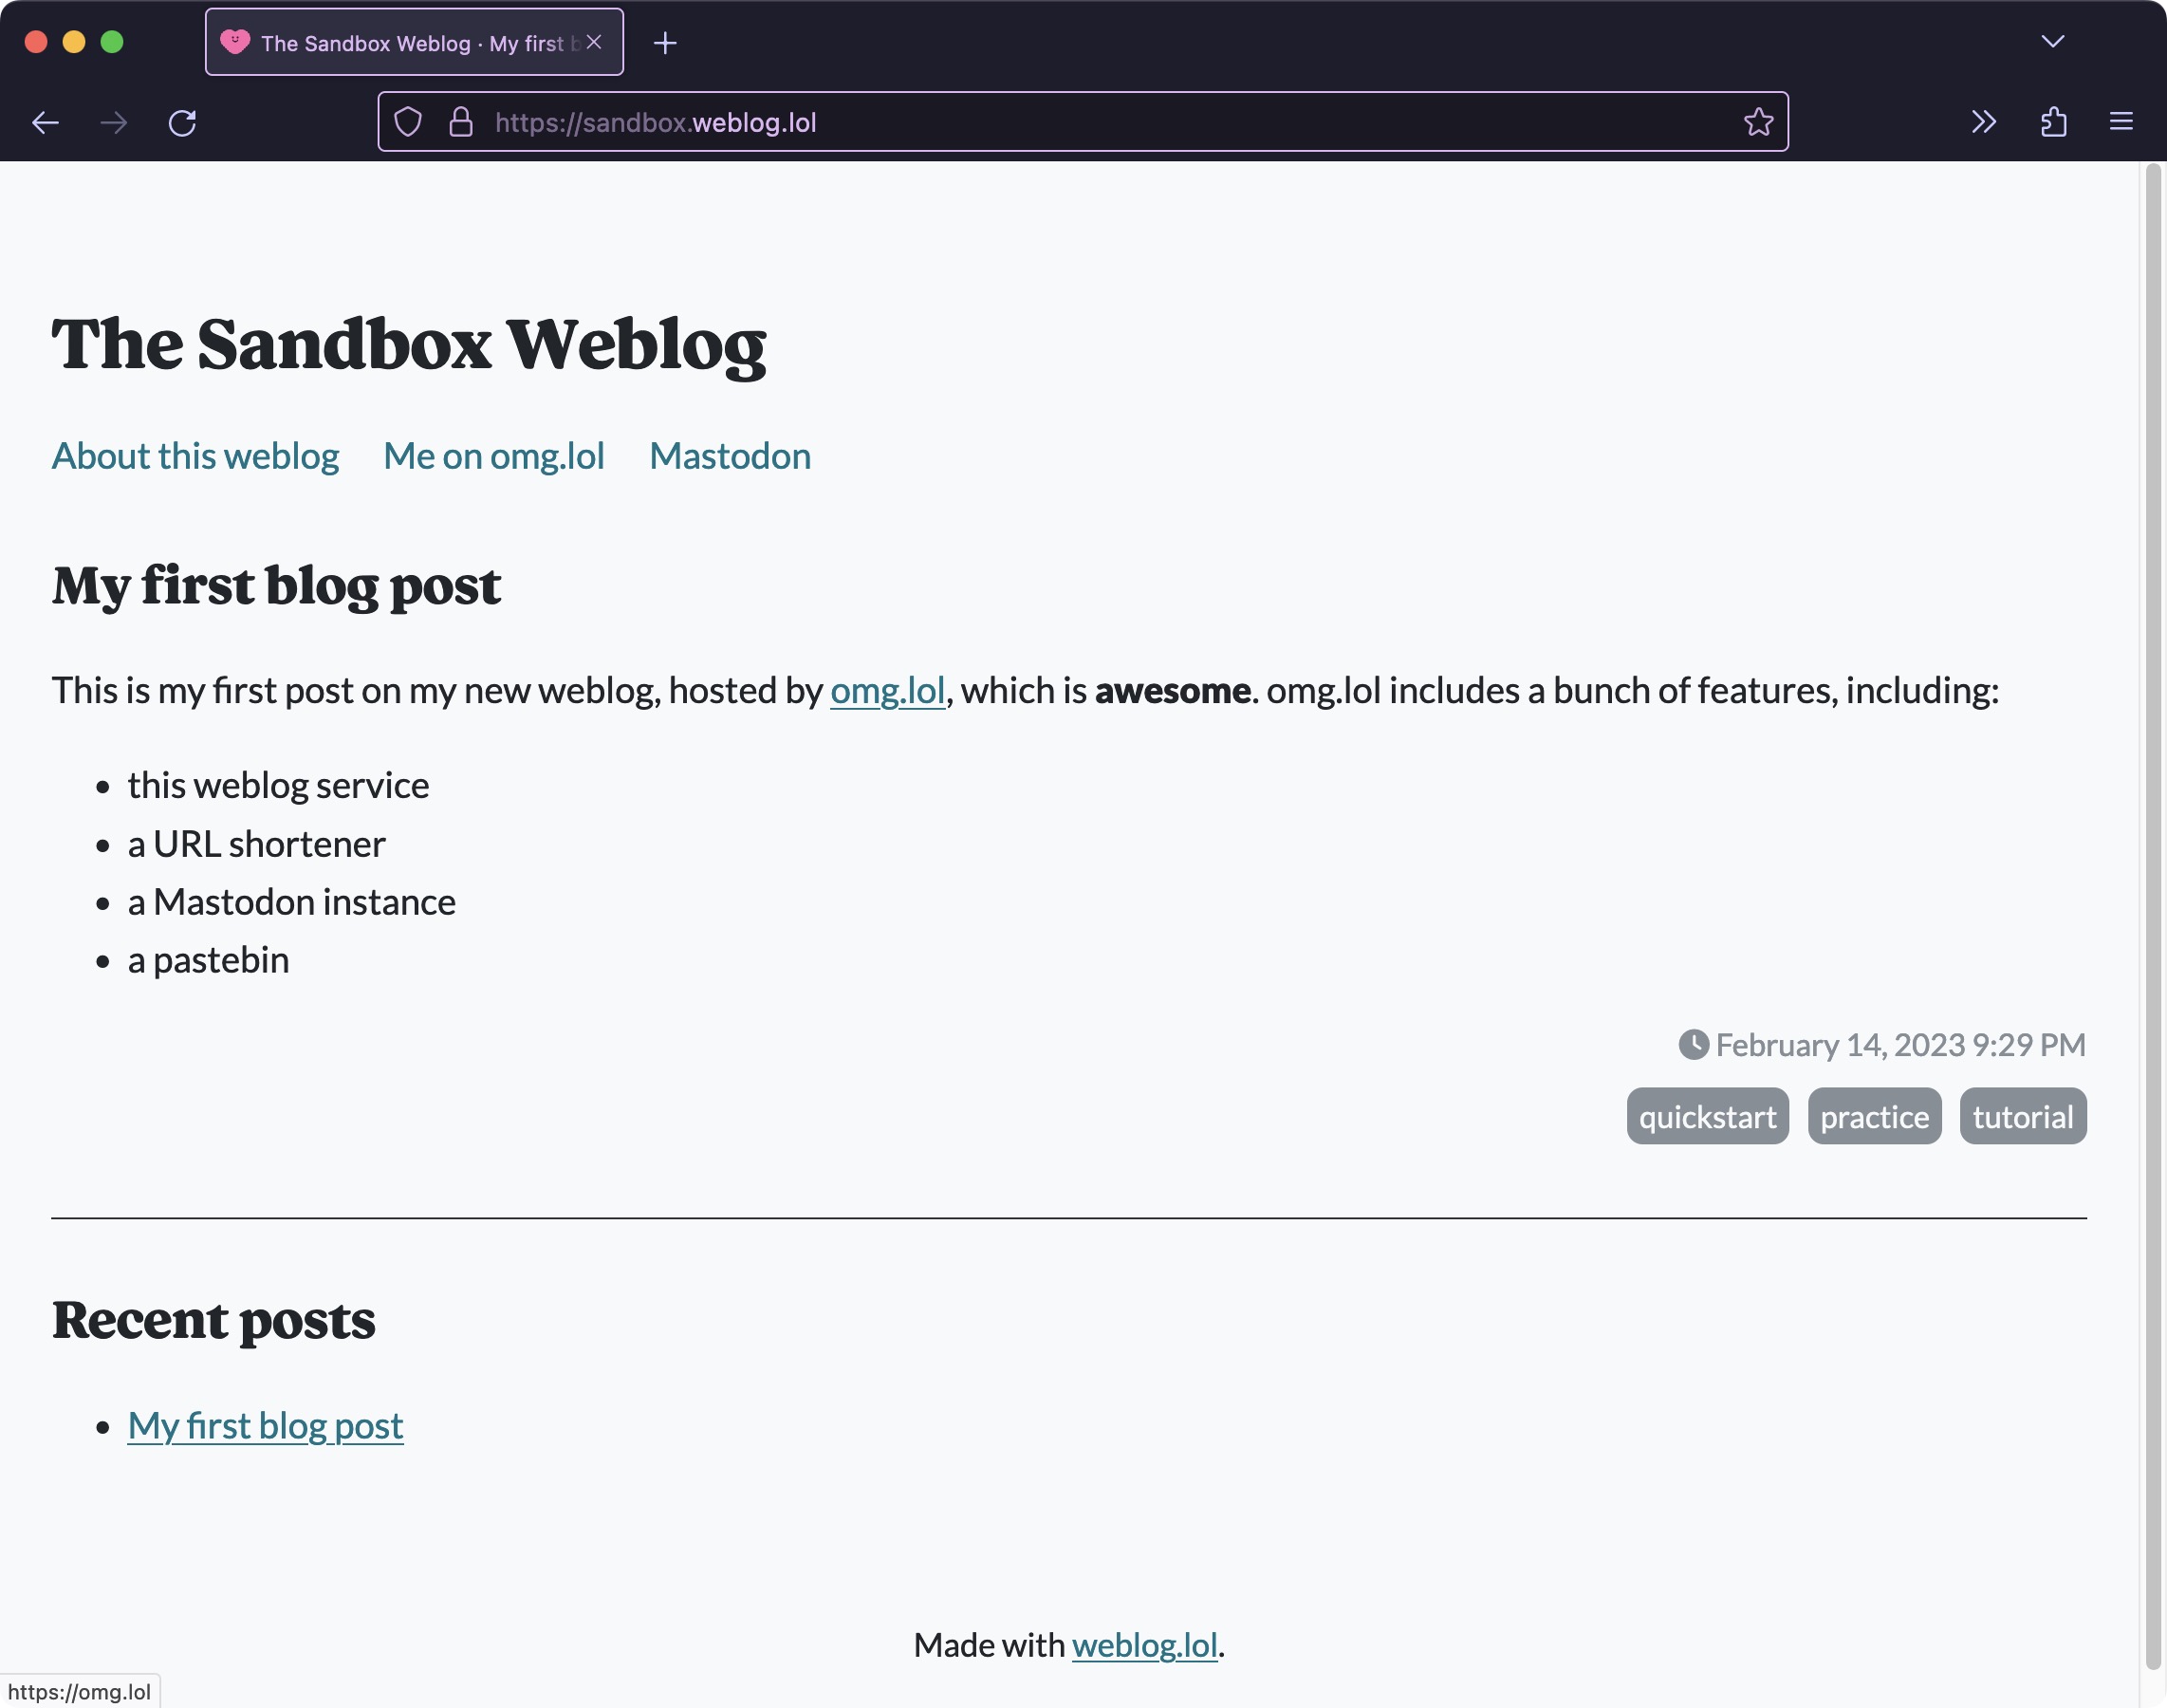
Here's an example that would create a navigation menu pointing to your about page, your omg.lol address page, and a Mastodon account. We'll make things a little easier to read by using Markdown for the last two links. Where we have YOUR_ADDRESS, replace it with your own omg.lol address:
// Navigation: about, another-page, <a href="https://example.com">Example</a>, [Example](https://example.com)
Navigation: about, [Me on omg.lol](https://social.lol/@YOUR_ADDRESS), [Mastodon](https://social.lol/@YOUR_ADDRESS)
Click "Save and Publish," visit your weblog's front page, and you should see your new navigation menu, looking something like this:
Date, time, and URL structures
Next, we're going to need to go on a brief excursion into a topic most programmers will be very familiar with: Formatting date and time. Learning how this works will help you both customize how your blog posts display the date and time they were published, and how your weblog structures post URLs.
Let's open your configuration file to get ready. If you don't remember how to find it:
- Visit https://omg.lol
- Click "Dashboard"
- Click "Weblog" (If you have more than one omg.lol address, click the one you want to use and then click "Weblog")
- Click the "Configuration" button in the "Tools" section, toward the bottom of the page.
Once you're in your configuration file, look for this line:
Date format: F j, Y g:i A
Based on what we've covered already, you probably understand you're looking at the Date format setting. This controls how the date and time are shown on your weblog. For instance, using this setting, your weblog will show the following as the date and time on blog posts:
February 10, 2023 6:24 PM
As you may have surmised, the individual letters in the setting you found in your configuration file are placeholders for date and time values. Here's a key:
-
F= the full version of the month name -
j= the day of the month -
Y= the four-digit year -
g= the hour (in 12-hour time format) -
i= the minutes after the hour -
A= AM/PM
Any spaces and punctuation you include in the Date format setting are shown as is by weblog.lol.
So, to provide a very simple example if you don't care about displaying the time that something was posted, you could change Date format to:
Date format: F j, Y
... and you'd see this on your weblog:
February 10, 2023
If you'd like to customize this further, we've put together a cheat sheet with all the placeholders. Here's another example using this guide:
Date format: l, jS F Y, g:i A T
Depending on when the post was written, this will result in a date and time line that looks like this:
Friday, 10th February 2023, 6:24 PM
Setting the URL structure
Setting the Date format gets you ready to create a custom URL structure.
Looking in your configuration file, scroll down until you find this line:
Post path format: /Y/m/
This is the Post path format setting, which determines how your URLs look. It uses the same placeholders the Date format setting uses. By default, your post paths will include a four-digit year and a two-digit month (with leading zeroes for single-digit month numbers). The blog post we created earlier in this guide, for instance, has a path something like:
2023/02/my-first-blog-post
You can use the same cheat sheet you used to set Date format to change everything in front of the slug (my-first-blog-post). For instance, you might want to leave out the month:
Post path format: /Y/
or add the day:
Post path format: /Y/m/d/
It's a good idea to think this through early on, before you have too many blog posts under your belt: If you change the Post path format down the line it will break any links, bookmarks, or search engine results that may exist.
All done!
And with that, this quick start guide comes to an end. There's still plenty to learn about, such as how to customize page templates, adjust the way some of the navigation features look on your blog, and more. We're working on a general reference manual to help people explore everything weblog.lol offers.
If you'd like to offer feedback on how to make this guide more useful, we'd love to hear from you via email or on Mastodon!